
Nothing kills your messaging momentum like nasty email errors, those vague policy violation warnings, and terse “recipient invalid” bouncebacks. But before you Hulk out on your device, take a deep breath. With this guide, you can troubleshoot and resolve the most common email failures—no tech support panic attacks required. We’ll explore what lurks behind cryptic 550 errors, waylay invalid recipient issues, escape the spam filter slammer, and revive busted servers. Arm yourself with knowledge and take back your inbox destiny!
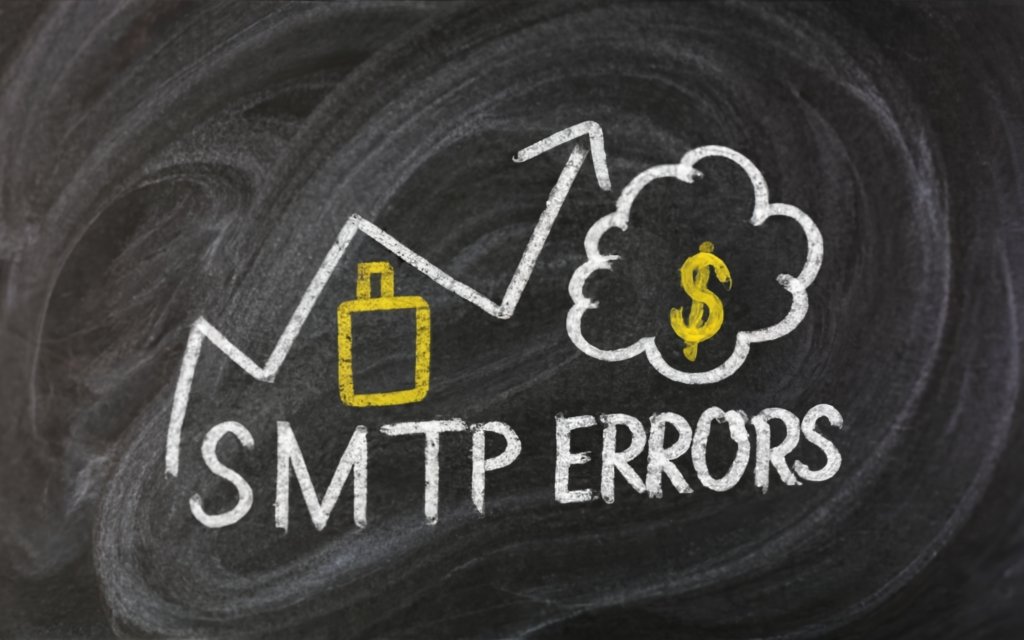
Understanding SMTP Error 550
Email working smoothly one minute, and the next you’re face-to-face with the dreaded SMTP 550 error. This common mailing error strikes fear into the hearts of email users everywhere. But don’t let those numbers and letters intimidate you! By understanding the 550 error, you can get your email back on track.
What Does the 550 Error Code Mean?
Let’s break it down:
- SMTP refers to Simple Mail Transfer Protocol – the system that governs how email is sent from one server to another.
- 550 is the error status code. It indicates the email was rejected or blocked by the receiving server.
- The numbers 5.5.0 provide extra detail on why the error occurred.
Basically, 550 means your email didn’t make it to the recipient. It was turned away at the door by the recipient’s server before arrival.
Common 550 Error Variations
550 errors come in all shapes and sizes, but a few usual suspects account for most issues:
- Invalid recipient address – A typo or outdated email prevents delivery. Double check the address and resend.
- Bad domain reputation – The recipient’s server doesn’t trust your domain, maybe due to past spam. Request delisting and improve authentication.
- Server downtime – The recipient’s server is temporarily unavailable. Try again later.
- Policy violation – Your email broke a rule like using a blocked attachment type. Review policies and adjust email accordingly.
- Authentication required – You need to enable SMTP authentication in your email client. Check settings and confirm valid credentials.
Decoding 550 Error Messages
550 error messages themselves provide hints about what went wrong. Here are some examples:
- “550 Recipient address rejected: User unknown” – The recipient address doesn’t exist on the server.
- 550 Sender rejected due to poor reputation” – Your domain has been blacklisted as a spam source.
- “550 Mail server temporarily unavailable” – The recipient server is down. Try again later.
- “550 Message content rejected for policy violation” – Your email broke a rule about allowed content.
- 550 Authentication required for relay” – You need to enable SMTP authentication in your email client.
So next time a 550 rears its head, don’t stress. Investigate the error details, identify the cause, and take steps to get your email back on track. With a little 550 error insight, you’ll be back to smooth mailing in no time.

Diagnosing Issues with Rejected or Blocked Emails
So you’ve been slapped with the dreaded delivery failure message. Your email has been unceremoniously rejected or blocked from reaching its destination. Now what? Don’t worry, we’ll transform you into an error diagnosis expert in no time.
Sender vs Recipient Server Problems
First, determine whether the issue lies with the sender or the recipient.
- Sender server – If your outbound emails fail regardless of recipient, the problem is on your end. Time to put your sender server under the microscope.
- Recipient server – If emails fail only when sending to certain addresses, the recipient server is likely the culprit. The domain could be blacklisted or temporarily unavailable.
Pro tip: Check the error message for clues on source. Messages like “550 Sender rejected” indicate sender reputation issues, while “550 Unable to relay” points to recipient server problems.
Checking Email Address Validity
An invalid recipient address is one of the most common causes of blocked emails. Verify the address exists and is spelled correctly.
- Test the address by sending an email from a different provider like Gmail. If it bounces back, the address is invalid.
- Check for typos by comparing the address to previous correspondences. One missed letter can break delivery.
- For large recipient lists, use email verification tools to audit and clean your contacts.
Pro tip: Some domains disable accounts after periods of inactivity. Ask the recipient to confirm the address is still active before troubleshooting further.
Testing Different Devices and Connections
If an address checks out, try sending from alternate devices and networks to isolate the problem.
- Send from your phone using mobile data instead of WiFi.
- Use a different computer on another network.
- Log into webmail and send from there.
If delivery succeeds from other avenues, there’s likely an issue with your primary device or network connection. Run diagnostics tests and scan for malware.
Pro tip: Some WiFi networks block port 25 for security reasons. Switch to mobile data when testing different connections.
Checking Service Status Pages
To check if an outage or technical issue is intercepting your delivery, browse service status pages.
- For your own domain, login to your provider account and check domain status.
- For recipient domains, Google “[domain] status” and look for a status page.
- Third-party tools like Downdetector can also highlight widespread service disruptions.
Pro tip: Sign up for email notifications from your provider for real-time updates on outages that may affect deliverability.
Arm yourself with these troubleshooting techniques to skillfully diagnose why an email was rejected or blocked. Identify whether the sender or recipient server is at fault, verify address validity, test different devices, and monitor service statuses. With some sleuthing, you can pinpoint the reason for delivery failures and get your emails back on track.
Fixing a 550 “Authentication Required” Error
Seeing “550 Authentication required” in response to an outbound email is like forgetting your hall pass. Without proper credentials, your email access is denied. Let’s get you authenticated so your messages can proceed to class (or the recipient’s inbox).
Enabling SMTP Authentication in Email Clients
Most email services require SMTP authentication these days. That means verifying your identity by signing in with a username and password.
To enable authentication:
- In desktop clients like Outlook or Thunderbird, check your account settings or SMTP configuration for an option to use SMTP auth.
- On mobile devices, ensure authentication is enabled for the email account in the device settings.
- For webmail through services like Gmail, Yahoo, or Outlook.com, authentication is usually enabled automatically.
Pro tip: Choose “Use same settings as incoming mail server” in SMTP settings instead of manually configuring credentials.
Confirming Credentials are Valid
A 550 auth error can also mean your credentials are incorrect:
- Double check your username and password are entered properly in your email client.
- Reset your account password if you can’t remember the current one.
- Generate an app password if using two-factor authentication.
Pro tip: App passwords are required for most email clients when two-factor auth is enabled.
Modifying the SMTP Port
Some networks block the default SMTP port 25 for security, leading to 550 errors even with proper credentials.
Try using an alternate port like 465, 587, 2525, or 2526 in your SMTP settings instead. This evades port blocking while still enabling authentication.
And voila! With authentication enabled, valid credentials double checked, and the SMTP port switched, your 550 hall pass error is cleared. Your emails can now deliver successfully once again.

Dealing with Invalid Recipient Address Errors
So you’ve double checked everything, but your emails still bounce back with an error that the recipient is invalid or unknown. Chances are there’s a simple typo or outdated address causing delivery failures. A few quick checks can get your emails heading to the right inbox again.
Correcting Typos
Fat finger syndrome strikes again! Human error is inevitable, so carefully eyeball the recipient address for any accidental character omissions or additions.
- Compare to previous emails sent to that contact to spot discrepancies.
- Copy and paste the address from your contact list to avoid manual typos.
- Use your email client’s address auto-complete feature when available.
Pro tip: There is no recovery from sending to the wrong “John Smith.” Proofread thoroughly!
Confirming Up-To-Date Contact Info
Even without typos, addresses can go bad due to:
- People changing jobs and emails.
- Companies migrating to new domains.
- Providers deactivating dormant accounts.
Verify you have the correct, active email address before troubleshooting further.
Pro tip: When asking contacts to confirm their addresses, include the invalid one you have listed for reference.
Using Email Verification Tools
For large recipient lists, inefficiently verifying each manually is an exercise in futility. Let automation help:
- Email verification services like ZeroBounce or MailTester can validate address accuracy in bulk.
- The validation APIs in email services like Mailchimp clean your contact lists.
- Downloadable validation tools like Email Checker for Outlook batch validate contacts.
Zero in on recipient address issues with these tips. Carefully proofread, confirm up-to-date emails, and utilize address verification to stop invalid recipient errors in their tracks.
Improving Sender Reputation to Avoid Blocks
Like trying to get into a club when you’re not on the list, emails from senders with poor reputations are frequently blocked from recipient servers. Boost your deliverability by rehabbing your domain’s image.
Checking Blacklists and Requesting Delisting
If your sending IP address or domain is on a spam blacklist, recipients will auto-reject your emails.
- Use a blacklist checking tool to see if you have been labeled as spam.
- If blacklisted, follow the delisting process for that specific blocklist. This usually involves verifying website ownership and committing to good sending practices.
Pro tip: Legitimate bulk emailers proactively monitor blacklist status to preserve deliverability.
Strengthening Authentication Methods
Weak authentication measures can lead to spoofing, phishing, and other behaviors that hurt sender reputation.
- Implement multi-factor or two-step authentication for added security.
- Use modern protocols like SPF, DKIM, and DMARC to prove email legitimacy.
- Keep credentials and access controls up-to-date and limited.
Pro tip: Monitoring aggregate and forensic reports in DMARC can reveal threats to your domain’s email integrity.
Modifying Email Content to Avoid Spam Triggers
Seemingly innocent content like preheader text, subjects, and links can accidentally trip spam filters.
- Avoid spam trigger words like “free,” “act now,” or “limited time.
- Host images on your own domain instead of linking externally.
- Make the Subject, Preheader, and visible content relevant to each other.
Pro tip: Services like Mailchimp or SendGrid can preview your message through spam filters before sending.
With a little reputation rehab, your domain can get off the email blacklist and back to inbox-bound deliverability.

Troubleshooting Server Downtime Issues
You’ve perfectly composed an email, but the “Service Unavailable” error taunts you every send attempt. Before abandoning your messaging hopes and dreams, try these tips to navigate around temporary server downtime.
Retrying During Alternate Hours
Like rush hour traffic jams, heavy email volume during peak business times can clog recipient servers and cause slowdowns.
- If possible, wait and resend your emails during off-peak hours like early morning or late evening. Less congestion improves deliverability.
- For important delivery attempts, try scheduling your email in advance to avoid high-traffic periods altogether.
Pro tip: Servers are most susceptible to overload issues on weekday mornings between 9 AM to 12 PM when everyone starts working.
Contacting the Recipient’s IT Team or Service Provider
For persistent downtime issues, contact the recipient’s IT team or email service provider directly.
- Email service status sites like Downdetector can indicate if others are reporting general problems.
- Call or email the recipient’s help desk to open a ticket for investigation.
- Submitting support tickets with your own domain host can also help identify server troubles impacting deliverability.
Pro tip: IT teams monitor and optimize server performance closely. Alerting them to persistent downtime helps speed resolution.
Requesting an Alternate Contact Email
If the downtime persists despite your best efforts, ask the recipient for an alternate email address on a different domain as a temporary workaround.
- Having accounts on a couple different providers prevents one outage from blocking communication entirely.
- Follow up periodically to see if the original problematic domain has been restored.
Pro tip: For important recipients, always good to maintain multiple contact emails even when things are running smoothly.
With some flexible timing, proactive IT engagement, and alternate contact channels, you can work around even the most stubborn email server downtime.
Avoiding Policy Violations
You and your email are squarely following all the rules. So why the “Message rejected for policy violation” errors? Turns out innocent content can sometimes break recipient server policies unintentionally. Avoid blocks by reviewing and adjusting your approach.
Reviewing and Following Provider Policies
Every major email service purposely publishes their sending policies to avoid ambiguities.
- For your own domain, ensure your configurations and sending practices follow your email host’s guidelines.
- When emailing high-volume recipients like Microsoft or Google addresses, read their sending policies closely.
Pro tip: Providers like Gmail list allowed attachment types, maximum sizes, link restrictions, and more. Know the rules!
Removing Problematic Attachments
Attachments are common email policy violators. Image, executable, archived, and multimedia files often raise red flags.
- Send attachments only when truly necessary and keep sizes reasonable.
- Consider uploading large files to a cloud drive and sending access links instead.
- Review allowed file types and try converting prohibited formats (like .exe to .zip).
Pro tip: When in doubt, leave it out! Send without attachments and follow up for requests.
Adjusting Email Content as Needed
Text content like hyperlinks can also trigger violations in overzealous spam filters.
- Avoid linking to filesharing sites or multiple redirects. Link directly to landing pages.
- Ensure linked pages load securely over HTTPS connections only.
- Use clean, minimal links with display text like “Our Website” instead of long ugly URLs.
Pro tip: Preview your email’s rendered content from the recipient’s perspective before sending.
Remember, just because something passes your own checks doesn’t guarantee compliance across all providers. When in doubt, tone it down and stick to plain text emails to avoid policy violations.
Summary: Fixing Common Email Errors for Smooth Sailing
Dealing with email errors can be frustrating, especially confusing 550 codes and obtuse policy violation messages. But armed with the right troubleshooting techniques, you can get back to inbox-bound smooth sailing.
For 550 errors, dig into the specifics of the message, validate credentials and configurations, and improve domain reputation. Checking blacklists, enabling SMTP authentication, and modifying email content helps resolve many 550 issues.
For invalid recipient problems, carefully verify addresses, update contacts, and use email validation tools to keep lists clean. Slow down and proof thoroughly before clicking send.
For policy violations, review and follow provider guidelines, limit attachments, and adjust hyperlinks and content. Err on the conservative side when unsure.
For server downtime, retry during off-peak hours, loop in IT teams for assistance, and request alternate contacts as a backup. A little patience and persistence goes a long way.
With the right mix of tools, best practices, and tenacious troubleshooting, you can diagnose email failures and return your messages to working delivery. Don’t let cryptic 550s, unknown recipients, spam filters, or downtime defeat you! Use these tips to emerge victorious over any email error.
Frequently Asked Questions About Email Errors
Still have questions about those pesky SMTP errors, invalid recipients, and message rejections? Here are answers to some frequently asked questions:
What is a 550 error?
A 550 error indicates the recipient server rejected or blocked the incoming email before delivery. The numbers 5.5.0 provide details on the specific reason. Common causes include invalid recipients, domain reputation issues, server problems, or missing authentication.
Why do I get invalid recipient errors?
Typos, stale contact information, deactivated accounts, and address formatting problems lead to invalid recipient errors when sending email. Always verify addresses are correct and active before troubleshooting other potential causes.
How can I check if my domain is blacklisted?
Blacklist checking tools like MXToolbox can search major blocklists to see if your IP address or domain has been flagged for spam. If blacklisted, you’ll need to request removal by validating ownership and showing good sending practices.
How do I enable SMTP authentication?
In your email client or app, look for SMTP or outgoing mail server settings. Enable the option to use authentication and ensure your username and password are entered correctly. This verifies your identity to send mail.
What are common policy violations?
Large attachments, prohibited file types, suspicious links, spammy words, and misleading content can all violate recipient server policies and cause rejection. Review rules and alter your approach accordingly.
Why do I get errors even when mail server is up?
Even with no downtime, heavy email traffic during peak hours can overload recipient servers and result in transient failures. Try resending during lower volume periods for better deliverability.
What’s the best way to confirm an email address is valid?
The only foolproof method is sending a test email from a known good account and watching for bouncebacks indicating issues. For large lists, use email verification services to validate accuracy in bulk.