IP warm up is the gradual process of increasing email sending volume from a new or cold IP address to build a positive sender reputation with Internet Service Providers (ISPs). When you start sending from a fresh IP, ISPs treat it with suspicion because it has no sending history. A structured IP warm up typically takes 4 to 8 weeks, during which you incrementally increase daily volume from a few dozen emails to your target sending capacity, while closely monitoring engagement, bounce rates, and spam complaints.
Without a proper IP warm up, your emails land in spam folders, your IP gets throttled or blacklisted, and you damage the domain reputation you may have spent months building. This guide covers everything you need to know about IP warm up in 2026, including the exact schedule to follow, how IP reputation scoring works, the 2024-2026 Gmail and Yahoo requirements that affect warm up, and how to troubleshoot common problems.
What is IP Warm Up?
IP warm up is the practice of gradually establishing a positive sending reputation for a new IP address by starting with low email volumes and increasing them over several weeks. ISPs like Gmail, Yahoo, and Microsoft 365 evaluate every new sender based on the reputation of the sending IP address. A brand new IP has a neutral or zero reputation, which means ISPs apply extra scrutiny to every message sent from it.
The core principle is simple: you need to prove to ISPs that you are a legitimate sender before they trust you with high-volume delivery. When you send a small number of well-targeted emails from a new IP and those emails generate positive engagement (opens, clicks, replies), the ISPs gradually assign a higher reputation score to that IP. As the score improves, you can send more emails without triggering spam filters or throttling.
IP warm up applies to two scenarios. The first is when you acquire a new dedicated IP address from your email service provider. The second is when you switch to a new email sending platform that assigns you a fresh IP. In both cases, the IP has no history, and you must build its reputation from scratch.
The warm up process involves more than just volume control. You also need proper email authentication (SPF, DKIM, DMARC), clean recipient lists, relevant content, and active monitoring of [email deliverability](https://blog.mystrika.com/email-deliverability/) metrics. Each of these elements contributes to how ISPs perceive your IP during the warm up period.
How IP Reputation Scoring Works
ISPs assign a reputation score to every IP address that sends email to their users. This score determines whether your email lands in the inbox, goes to the spam folder, or gets blocked entirely. Understanding how this scoring works is essential for a successful IP warm up.
Factors That Influence IP Reputation
ISPs evaluate multiple signals to calculate IP reputation. The most important factors are:
| Factor | Impact on Reputation | What ISPs Look For |
|---|---|---|
| Spam complaint rate | High | Percentage of recipients who mark your email as spam. Target below 0.10%. |
| Bounce rate | High | Hard bounces (invalid addresses) damage reputation more than soft bounces. |
| Engagement rate | High | Opens, clicks, replies, and forwards signal positive intent. |
| Sending volume consistency | Medium | Sudden spikes or drops in volume trigger ISP scrutiny. |
| Email authentication | High | Missing or misconfigured SPF, DKIM, or DMARC causes rejection. |
| Blacklist presence | Critical | Being listed on any major DNSBL blocks delivery entirely. |
| Content quality | Medium | Spammy language, excessive links, and poor formatting hurt reputation. |
The Reputation Score Scale
ISPs do not publish their exact scoring algorithms, but industry research and tools like Google Postmaster Tools provide visibility into the general scale:
| Score Range | Reputation Level | Typical Inbox Placement | Common Restrictions |
|---|---|---|---|
| 90-100 | Excellent | 95-98% | None |
| 70-89 | Good | 80-94% | Minor throttling possible |
| 50-69 | Fair | 60-79% | Moderate throttling, bulk folder |
| 30-49 | Poor | 30-59% | Heavy throttling, spam folder |
| 0-29 | Terrible | 0-29% | Blocks, blacklists |
A new IP starts at the bottom of this scale. Each day of successful sending with good engagement moves the score upward. A single day of high complaint rates can drop the score by 20-30 points, and recovery takes 30-60 days.
How ISPs Calculate Reputation for New IPs
When you start sending from a new IP, ISPs place it in a probationary state. Gmail, for example, routes a portion of your emails to the spam folder automatically to observe how recipients react. If recipients open and engage with the emails that land in the inbox, Gmail gradually reduces the spam folder rate and increases inbox placement.
This probationary period typically lasts 2 to 4 weeks, depending on your sending patterns and engagement metrics. During this time, every metric matters more than it will once your reputation is established. A single complaint spike during the first two weeks can set you back by an entire week of progress.
Google Postmaster Tools provides direct visibility into your Gmail reputation. It shows your IP reputation as bad, low, medium, or high, along with your spam complaint rate and delivery errors. Setting up Postmaster Tools before you start your IP warm up is one of the most important steps you can take.

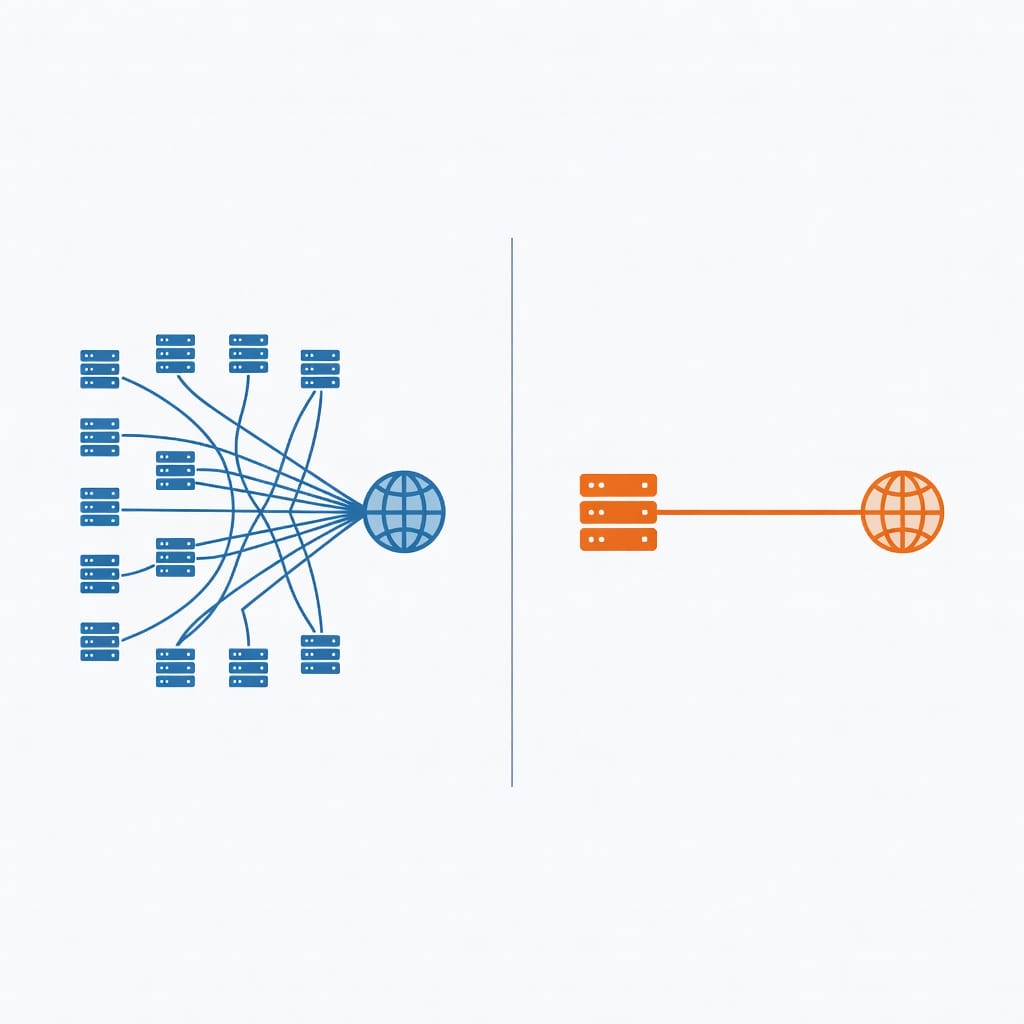
Shared IP vs Dedicated IP: Which Do You Need?
Before you plan your IP warm up, you need to decide whether to use a shared IP or a dedicated IP. This decision affects the warm up process, the timeline, and your long-term deliverability strategy.
| Factor | Shared IP | Dedicated IP |
|---|---|---|
| Cost | Included in most email service plans | $30 to $100 per month extra |
| Reputation | Shared with other senders on the same IP | Yours alone to control |
| Warm up required | Usually not needed | Required for new IPs |
| Volume requirement | Works for any volume | Best for 100,000+ emails per month |
| Reputation control | Limited – other senders affect your delivery | Full control |
| Risk of reputation damage | High – one bad sender on the IP hurts everyone | Low – only your sending matters |
| Best for | Low to medium volume senders, new senders | High volume senders, established senders |
When to Use a Shared IP
Shared IPs are the default for most email service providers. Multiple customers send from the same pool of IP addresses, and the reputation of that pool is determined by the aggregate behavior of all senders. If you send fewer than 100,000 emails per month, a shared IP is usually the better choice.
The main advantage of a shared IP is that you do not need to warm it up. The IP pool already has an established reputation from other senders. You can start sending immediately, though you should still follow good deliverability practices.
The main disadvantage is that you have no control over the other senders on your shared IP. If another sender on the same IP has a complaint spike or gets blacklisted, your deliverability suffers too. This is known as the bad neighbor effect.
When to Use a Dedicated IP
A dedicated IP is an IP address that only you use. You have full control over its reputation, and no other sender can affect your deliverability. Dedicated IPs are recommended when you send more than 100,000 emails per month, or when you need consistent, predictable deliverability for transactional or business-critical emails.
The trade-off is that you must warm up a dedicated IP from scratch. This takes 4 to 8 weeks of careful volume management. You also pay a premium, typically $30 to $100 per month depending on your email service provider.
Decision Matrix: Shared vs Dedicated IP
Use this decision matrix to determine which option fits your situation:
| Your Situation | Recommended Choice | Why |
|---|---|---|
| Sending under 50,000 emails per month | Shared IP | Cost effective, no warm up needed |
| Sending 50,000 to 100,000 per month | Shared IP or Dedicated IP | Depends on reputation sensitivity |
| Sending over 100,000 per month | Dedicated IP | Volume justifies dedicated reputation |
| Cold email outreach | Dedicated IP | Higher complaint risk needs isolation |
| Transactional emails | Dedicated IP | Critical delivery requires full control |
| New sender with no list | Shared IP | Start without warm up complexity |
| Switching ESPs | Dedicated IP | Preserve reputation from old setup |
2024-2026 Email Deliverability Requirements You Must Know
The email deliverability landscape changed significantly in 2024 when Gmail and Yahoo implemented new bulk sender requirements. These requirements directly affect how you approach IP warm up in 2026.
Gmail and Yahoo Bulk Sender Requirements (2024+)
Starting February 2024, Gmail and Yahoo enforced mandatory requirements for any sender who sends more than 5,000 emails per day to their domains. These requirements are still in effect in 2026 and have become the baseline for email deliverability.
The requirements are:
1. Email authentication is mandatory. You must have SPF, DKIM, and DMARC configured for your sending domain. DMARC must be set to at least p=none (quarantine or reject is better). Without proper authentication, Gmail and Yahoo will reject your email or route it to spam.
2. Spam complaint rate must stay below 0.10%. Gmail requires a spam complaint rate below 0.10% (one complaint per 1,000 emails). Yahoo has the same threshold. If your complaint rate exceeds 0.10%, your delivery will be throttled. If it exceeds 0.30%, Gmail may block your email entirely.
3. One-click unsubscribe is required. All commercial and promotional emails must include a visible one-click unsubscribe link in the email body. Gmail and Yahoo require that unsubscribe requests are processed within two days.
4. A valid From domain is required. You cannot use a generic From address like [email protected]. The From domain must match the domain you authenticated with SPF and DKIM.
5. Forward-return-path alignment is recommended. For DMARC alignment, the domain in the Return-Path header should match the From domain or be in the same organizational domain.
How These Requirements Affect IP Warm Up
The 2024-2026 requirements make IP warm up more structured than it was in previous years. Here is what changed:
Authentication is no longer optional. Before 2024, you could warm up an IP with minimal authentication and still achieve reasonable delivery. Now, Gmail and Yahoo will not accept email from unauthenticated senders. Your first step in any IP warm up must be configuring SPF, DKIM, and DMARC.
Complaint rate monitoring is critical. The 0.10% complaint threshold means you need to be more careful about who you send to during warm up. Sending to unengaged or purchased lists during warm up will push your complaint rate above the threshold and ruin your IP reputation before it starts.
Domain age matters more. Gmail applies additional scrutiny to domains registered less than 30 days ago. If your sending domain is new, you should warm up the domain separately from the IP, or use a subdomain of an established domain.
BIMI: The New Standard for Brand Trust
BIMI (Brand Indicators for Message Identification) is becoming a standard for email authentication in 2025-2026. BIMI displays your brand logo next to your email in supporting email clients, which increases trust and engagement. While BIMI is not required for IP warm up, having it configured signals to ISPs that you are a legitimate, verified sender.
To implement BIMI, you need:
- DMARC at p=quarantine or p=reject
- A BIMI logo in SVG format
- A Verified Mark Certificate (VMC) for the logo
- A BIMI DNS record on your sending domain
IP Warm Up Timeline: How Long Does It Take?
The most common question about IP warm up is how long it takes. The answer depends on several factors, but the general timeline is 4 to 8 weeks for a dedicated IP.
| Week | Daily Volume Range | Cumulative Emails Sent | Reputation Milestone |
|---|---|---|---|
| Week 1 | 50 to 200 | 350 to 1,400 | Initial reputation building |
| Week 2 | 200 to 500 | 1,750 to 4,900 | Low reputation established |
| Week 3 | 500 to 1,000 | 5,250 to 11,900 | Medium-low reputation |
| Week 4 | 1,000 to 2,500 | 12,250 to 29,400 | Medium reputation |
| Week 5 | 2,500 to 5,000 | 29,750 to 64,400 | Medium-high reputation |
| Week 6 | 5,000 to 10,000 | 64,750 to 134,400 | High reputation |
| Week 7 | 10,000 to 25,000 | 134,750 to 309,400 | Very high reputation |
| Week 8+ | Full volume | 309,400+ | Established reputation |
Factors That Affect Warm Up Duration
Your target volume. If you plan to send 10,000 emails per day, you can complete warm up in 4 to 5 weeks. If you plan to send 500,000 per day, expect 8 to 12 weeks.
Your list quality. A clean, engaged list accelerates warm up. A list with invalid addresses, spam traps, or unengaged recipients slows it down or causes failure.
Your engagement rates. High open rates (30%+) and reply rates (2%+) signal positive reputation to ISPs. Low engagement means slower reputation growth.
Your complaint rate. Every complaint above 0.10% during warm up sets you back by days or weeks. Keeping complaints below 0.05% is ideal during the first 4 weeks.
Your email service provider. Some ESPs have automated warm up programs that accelerate the process. Others leave the manual work to you.
The time of year. Warm up during holiday seasons (November-December) is slower because ISPs are more aggressive with spam filtering. January and February are typically the best months for warm up.
Can You Speed Up IP Warm Up?
You cannot safely skip steps in IP warm up, but you can optimize the process to reach full volume faster:
- Use a warm up pool. Some email service providers offer warm up pools where your IP sends alongside established IPs, sharing their reputation. This can reduce warm up time to 2 to 3 weeks.
- Send to your most engaged segment first. Your best subscribers (those who opened and clicked in the last 30 days) generate the strongest positive signals. Send to them exclusively for the first week.
- Use a subdomain of an established domain. If your main domain has good reputation, sending from a subdomain (like mail.yourdomain.com) inherits some of that reputation, reducing warm up time.
- Maintain consistent sending patterns. ISPs reward predictability. Send at the same time every day, keep volume increases gradual, and never skip a day during the first 3 weeks.
IP Warm Up Schedule: A Week-by-Week Guide
This is a practical, actionable IP warm up schedule that works for most senders. Adjust the volumes based on your target capacity, but keep the percentage increases consistent.
Pre-Warm Up Checklist (Before Day 1)
Complete these steps before you send a single email from your new IP:
- [ ] Configure SPF record for your sending domain
- [ ] Configure DKIM signing for your sending domain
- [ ] Configure DMARC policy (start with p=none, move to p=quarantine after warm up)
- [ ] Set up Google Postmaster Tools for your sending domain
- [ ] Set up Microsoft SNDS (Smart Network Data Services) if sending to Outlook.com
- [ ] Verify your sending domain is not on any blacklists
- [ ] Segment your email list by engagement (last 30 days, 30-90 days, 90-180 days, 180+ days)
- [ ] Remove all invalid, bounced, and unengaged addresses from your list
- [ ] Remove any purchased or scraped email addresses
- [ ] Prepare your warm up content (relevant, non-spammy, personalized)
- [ ] Set up bounce and complaint handling (automated suppression)
- [ ] Configure one-click unsubscribe in all email templates
- [ ] Test your email sending infrastructure with a small test send
Week 1: Foundation (Days 1-7)
Daily volume: 50 to 200 emails per day
Recipients: Your most engaged segment only (opened or clicked in the last 7 days)
Focus: Establish baseline reputation with high-quality engagement
Day 1: Send 50 emails to your most recently engaged contacts.
Day 2: Send 75 emails. Monitor bounce rate and complaint rate from Day 1.
Day 3: Send 100 emails. Check Google Postmaster Tools for initial reputation data.
Day 4: Send 100 emails. Verify all emails are landing in inbox, not spam.
Day 5: Send 150 emails. Check for any blacklist appearances.
Day 6: Send 150 emails. Review engagement metrics from the week.
Day 7: Send 200 emails. Assess whether to increase volume next week.
Key metrics to watch: Bounce rate below 3%, complaint rate below 0.05%, open rate above 30%.
Week 2: Gradual Increase (Days 8-14)
Daily volume: 200 to 500 emails per day
Recipients: Your most engaged segment (last 30 days)
Focus: Build positive signals with consistent sending
Day 8: Send 200 emails.
Day 9: Send 250 emails.
Day 10: Send 300 emails.
Day 11: Send 300 emails.
Day 12: Send 400 emails.
Day 13: Send 400 emails.
Day 14: Send 500 emails.
Key metrics to watch: Google Postmaster Tools should show low or medium reputation by end of week 2. Complaint rate must stay below 0.10%.
Week 3: Expansion (Days 15-21)
Daily volume: 500 to 1,000 emails per day
Recipients: Engaged segment (last 30-60 days) plus a small portion of your 60-90 day segment
Focus: Expand reach while maintaining engagement quality
Day 15: Send 500 emails.
Day 16: Send 600 emails.
Day 17: Send 700 emails.
Day 18: Send 700 emails.
Day 19: Send 800 emails.
Day 20: Send 900 emails.
Day 21: Send 1,000 emails.
Key metrics to watch: Open rate should stay above 25%. If it drops below 20%, pause volume increases and send to a more engaged segment.
Week 4: Building Momentum (Days 22-28)
Daily volume: 1,000 to 2,500 emails per day
Recipients: Full engaged list (last 90 days) plus a small portion of your 90-180 day segment
Focus: Approach medium reputation level
Day 22: Send 1,000 emails.
Day 23: Send 1,200 emails.
Day 24: Send 1,500 emails.
Day 25: Send 1,500 emails.
Day 26: Send 1,800 emails.
Day 27: Send 2,000 emails.
Day 28: Send 2,500 emails.
Key metrics to watch: Google Postmaster Tools should show medium reputation. Complaint rate must stay below 0.10%. Check for any throttling.
Week 5: Scaling Up (Days 29-35)
Daily volume: 2,500 to 5,000 emails per day
Recipients: Full engaged list plus re-engagement campaigns for 180+ day segment
Focus: Approach target volume while monitoring for reputation drops
Day 29: Send 2,500 emails.
Day 30: Send 3,000 emails.
Day 31: Send 3,500 emails.
Day 32: Send 3,500 emails.
Day 33: Send 4,000 emails.
Day 34: Send 4,500 emails.
Day 35: Send 5,000 emails.
Key metrics to watch: Google Postmaster Tools should show medium to high reputation. Bounce rate below 5%. Complaint rate below 0.10%.
Week 6: Approaching Full Volume (Days 36-42)
Daily volume: 5,000 to 10,000 emails per day
Recipients: Full list including reactivated segments
Focus: Reach target volume with stable reputation
Day 36: Send 5,000 emails.
Day 37: Send 6,000 emails.
Day 38: Send 7,000 emails.
Day 39: Send 7,000 emails.
Day 40: Send 8,000 emails.
Day 41: Send 9,000 emails.
Day 42: Send 10,000 emails.
Key metrics to watch: Google Postmaster Tools should show high reputation. Inbox placement rate above 95%.
Week 7-8: Full Volume (Days 43-56)
Daily volume: Your target sending volume
Recipients: Full list
Focus: Maintain reputation with consistent sending
Continue at your target volume. Monitor metrics daily for the first week at full volume. If you see any negative trends (complaint rate increase, open rate drop, blacklist appearance), reduce volume by 50% and investigate the cause before resuming.
How to Monitor Your IP Reputation During Warm Up
Monitoring your IP reputation during warm up is not optional. You need real-time visibility into how ISPs perceive your sending IP so you can adjust your strategy before problems become permanent.
Google Postmaster Tools
Google Postmaster Tools is the most important monitoring tool for IP warm up. It provides direct data from Gmail about your sending reputation, complaint rates, and delivery errors.
To set up Postmaster Tools:
1. Go to postmaster.google.com
2. Add your sending domain
3. Verify domain ownership via DNS TXT record
4. Wait 24-48 hours for data to appear
Key metrics to monitor in Postmaster Tools:
- IP Reputation: Shows as Bad, Low, Medium, or High. During warm up, you should see this move from Low to Medium to High over 4-6 weeks.
- Spam Complaint Rate: Shows the percentage of recipients who marked your email as spam. Must stay below 0.10%.
- Delivery Errors: Shows why Gmail rejected your emails. Common errors include authentication failures, rate limiting, and content filtering.
- Domain Reputation: Shows the reputation of your sending domain separately from your IP.
Microsoft SNDS (Smart Network Data Services)
Microsoft SNDS provides similar data for Outlook.com and Microsoft 365 recipients. It shows your IP reputation, complaint rates, and spam filter data for Microsoft email addresses.
To set up SNDS:
1. Go to snds.microsoft.com
2. Register your sending IP address
3. Verify ownership via DNS or email
4. Configure daily data reports
Third-Party Monitoring Tools
Several third-party tools provide comprehensive IP reputation monitoring:
| Tool | What It Monitors | Best For |
|---|---|---|
| MXToolbox | Blacklist status, DNS health | Quick blacklist checks |
| Validity Everest | Full deliverability dashboard | Enterprise monitoring |
| 250ok | Real-time deliverability analytics | Advanced deliverability teams |
| DNSBL.info | Multi-blacklist monitoring | Free blacklist monitoring |
| Spamhaus | Blacklist status and delisting | Blacklist prevention |
What to Check Daily During Warm Up
Create a daily monitoring routine during the warm up period:
1. Check Google Postmaster Tools for IP reputation and complaint rate
2. Check Microsoft SNDS for Outlook delivery data
3. Run a blacklist check on MXToolbox or DNSBL.info
4. Review your email service provider’s delivery analytics
5. Check your bounce rate and categorize bounces (hard vs soft)
6. Review your complaint rate from your ESP’s feedback loop
7. Verify your SPF, DKIM, and DMARC records are still valid
Warning Signs That Your Warm Up Is Failing
Stop increasing volume and investigate if you see any of these signs:
- Google Postmaster Tools shows Bad or Low reputation after 3+ weeks of warm up
- Spam complaint rate exceeds 0.10% on any single day
- Bounce rate exceeds 5% consistently
- Open rate drops below 15% for more than 2 consecutive days
- Your IP appears on any blacklist
- Gmail or Yahoo starts blocking your email (check delivery errors in Postmaster Tools)
- Inbox placement rate drops below 50% (use a seed testing tool to verify)
Common IP Warm Up Problems and How to Fix Them
Even with careful planning, IP warm up can go wrong. Here are the most common problems and how to fix them.
Problem 1: High Spam Complaint Rate
Symptoms: Google Postmaster Tools shows complaint rate above 0.10%. Emails start landing in spam folders.
Causes: Sending to unengaged recipients, purchased lists, or recipients who do not recognize your brand. Poor list segmentation.
Fix: Stop sending to the segment that generated the complaints. Review your list sources and remove any addresses that did not opt in. Reduce your daily volume by 50% and send only to your most engaged segment (opened in the last 7 days) for 5-7 days. The complaint rate should drop as you send to better-targeted recipients.
Problem 2: High Bounce Rate
Symptoms: More than 5% of your emails bounce. Hard bounces indicate invalid addresses.
Causes: Sending to old or unverified lists. Using purchased or scraped email addresses. Not removing previously bounced addresses.
Fix: Immediately stop sending to the list that generated the bounces. Use an email verification service to clean your list before resending. Set up automated bounce handling so that hard bounces are automatically suppressed from future sends. Reduce volume by 50% and resume with a verified list.
Problem 3: IP Gets Blacklisted
Symptoms: Your IP appears on Spamhaus, Barracuda, or other DNSBLs. Email delivery drops to near zero.
Causes: High complaint rate, spam trap hits, or sending to harvested addresses.
Fix: Identify which blacklist you are on and follow their delisting process. Spamhaus requires you to fix the root cause before they remove your IP. This typically takes 24-72 hours. After delisting, restart your warm up from week 1 volumes and rebuild reputation.
Problem 4: Emails Going to Spam Despite Low Complaint Rate
Symptoms: Google Postmaster Tools shows good reputation, but seed tests show emails landing in spam.
Causes: Content filtering issues, poor email authentication, or domain reputation problems separate from IP reputation.
Fix: Check your email content for spam triggers (excessive links, spammy words, image-only emails). Verify your SPF, DKIM, and DMARC records are correctly configured. Check your domain reputation separately from your IP reputation. If your domain is new (under 30 days), consider using a subdomain of an established domain.
Problem 5: Inconsistent Sending Volume
Symptoms: You send 1,000 emails one day and 100 the next. ISPs throttle your delivery.
Causes: Skipping days during warm up. Not following a consistent schedule. Technical issues that prevent sending.
Fix: Maintain a consistent daily sending schedule. If you miss a day, do not double the volume the next day. Resume at the previous day’s volume and hold steady for 2-3 days before increasing again.
Problem 6: Authentication Failures
Symptoms: Google Postmaster Tools shows authentication errors. Emails are rejected or marked as spam.
Causes: Missing or misconfigured SPF, DKIM, or DMARC records. Using a From address that does not match the authenticated domain.
Fix: Verify your SPF record includes all authorized sending IPs. Confirm DKIM is signing all outgoing emails. Set up DMARC with at least p=none to start, then move to p=quarantine after warm up. Ensure your From domain matches your DKIM signing domain.
Problem 7: Slow Reputation Growth
Symptoms: After 4 weeks of warm up, Google Postmaster Tools still shows Low reputation.
Causes: Low engagement rates, sending to unengaged recipients, or inconsistent sending patterns.
Fix: Send to a more engaged segment. If your open rate is below 20%, your recipients are not engaged enough to build reputation. Consider running a re-engagement campaign before continuing warm up. Increase personalization in your email content to improve engagement.
IP Warm Up Best Practices for Cold Email Outreach
Cold email outreach has different warm up requirements than marketing email. Cold emails inherently generate lower engagement rates and higher complaint rates, which makes IP warm up more challenging.
Why Cold Email Warm Up Is Different
Cold email recipients did not explicitly opt in to receive your emails. This means:
- Open rates are lower. Cold email open rates typically range from 20% to 40%, compared to 30% to 50% for permission-based marketing email.
- Reply rates are lower. Cold email reply rates average 1% to 5%, while marketing email click rates can be 2% to 10%.
- Complaint rates are higher. Cold email complaint rates can reach 0.2% to 0.5%, which exceeds the Gmail and Yahoo threshold of 0.10%.
- Spam trap risk is higher. Cold email lists are more likely to contain spam traps, which instantly damage IP reputation.
Cold Email IP Warm Up Schedule
If you are warming up an IP for cold email outreach, use a more conservative schedule:
| Week | Daily Volume | Notes |
|---|---|---|
| Week 1 | 20 to 50 | Send only to verified, high-quality prospects |
| Week 2 | 50 to 100 | Expand to broader prospect list |
| Week 3 | 100 to 200 | Monitor complaint rate closely |
| Week 4 | 200 to 500 | Continue gradual increase |
| Week 5 | 500 to 1,000 | Approach medium volume |
| Week 6 | 1,000 to 2,000 | Full cold email volume |
Cold Email Warm Up Best Practices
Verify every email address before sending. Use email verification to remove invalid addresses, role-based addresses (info@, sales@), and disposable email domains. A clean list reduces bounces and protects your IP reputation.
Personalize every email. Generic cold emails generate higher complaint rates. Personalization increases engagement and reduces complaints. Include the recipient’s name, company, and a specific reason for reaching out.
Monitor reply rates as your primary metric. For cold email, reply rate is the strongest positive signal you can send to ISPs. A reply signals that the recipient wanted to hear from you. Aim for a reply rate above 2% during warm up.
Use a separate sending domain for cold email. If your cold email domain gets blacklisted, it does not affect your main business domain. Use a subdomain or a separate domain for cold email outreach.
Implement a feedback loop. Most email service providers offer feedback loops that notify you when recipients mark your email as spam. Use this data to immediately suppress complainers from future sends.
Keep your email content relevant and non-promotional. Cold emails that look like marketing newsletters generate more complaints. Keep your cold emails short, personalized, and focused on starting a conversation.
Use automated warm up tools. Some cold email platforms include automated IP warm up features that gradually increase sending volume and monitor reputation metrics. These tools can reduce the manual effort of warm up while maintaining deliverability.

Key Takeaways
- IP warm up is the gradual process of building sender reputation for a new IP address by starting with low email volumes and increasing over 4 to 8 weeks.
- ISPs evaluate IP reputation based on spam complaint rate, bounce rate, engagement rate, email authentication, and blacklist presence.
- Gmail and Yahoo require spam complaint rates below 0.10% and mandatory SPF, DKIM, and DMARC authentication for all senders.
- A dedicated IP requires warm up; a shared IP does not, but shared IPs carry the risk of other senders affecting your reputation.
- The standard IP warm up schedule starts at 50-200 emails per day in week 1 and increases to full volume by week 6-8.
- Google Postmaster Tools and Microsoft SNDS are essential for monitoring IP reputation during warm up.
- Cold email warm up requires a more conservative schedule and stricter list verification due to higher complaint rates.
- Common warm up problems include high complaint rates, high bounce rates, blacklisting, and slow reputation growth, each with specific fixes.
- The 2024-2026 Gmail and Yahoo bulk sender requirements make email authentication and complaint rate management mandatory for successful IP warm up.
Frequently Asked Questions
How long does IP warm up take?
IP warm up typically takes 4 to 8 weeks for a dedicated IP address. The exact duration depends on your target sending volume, list quality, engagement rates, and complaint rates. A sender targeting 10,000 emails per day with a clean, engaged list can complete warm up in 4 to 5 weeks. A sender targeting 500,000 emails per day should expect 8 to 12 weeks. The warm up is complete when Google Postmaster Tools shows High reputation and your inbox placement rate exceeds 95%.
Can I speed up the IP warm up process?
You cannot safely skip steps in IP warm up, but you can optimize the process. Using a warm up pool (where your IP sends alongside established IPs) can reduce warm up time to 2 to 3 weeks. Sending exclusively to your most engaged segment generates stronger positive signals. Using a subdomain of an established domain inherits some domain reputation. Maintaining consistent daily sending patterns also helps ISPs build trust faster. However, rushing volume increases beyond 50% week-over-week risks reputation damage that takes 30 to 60 days to repair.
What happens if I send too many emails during IP warm up?
Sending too many emails too quickly during IP warm up triggers ISP throttling, spam folder placement, and potential blacklisting. When ISPs see a sudden volume spike from a new IP, they interpret it as a compromised account or a spammer. Your emails get routed to the spam folder, your complaint rate spikes, and your IP reputation drops. Recovery from a volume spike incident takes 30 to 60 days of careful sending. In severe cases, the IP may be permanently blacklisted, requiring you to request a new IP and start the warm up from scratch.
Do I need to warm up a shared IP?
You generally do not need to warm up a shared IP because the IP pool already has an established reputation from other senders on the same IP. However, you should still follow good deliverability practices when starting on a shared IP. Send to clean, engaged lists, authenticate your email, and monitor your complaint rate. If the shared IP pool has a poor reputation due to other senders, you may need to request a different shared IP pool from your email service provider.
What is the difference between IP warm up and domain warm up?
IP warm up builds the reputation of your sending IP address, while domain warm up builds the reputation of your sending domain. They are separate but related processes. A new domain (registered less than 30 days) faces additional scrutiny from Gmail and Yahoo regardless of the IP reputation. Domain warm up follows a similar gradual volume increase pattern but focuses on domain-level signals like SPF, DKIM, and DMARC alignment. For best results, warm up both your IP and your domain simultaneously, or use a subdomain of an established domain to bypass domain warm up.
How do I know if my IP warm up is working?
You can tell your IP warm up is working when Google Postmaster Tools shows your IP reputation moving from Low to Medium to High over the course of 4 to 6 weeks. Your spam complaint rate should stay below 0.10% and ideally below 0.05%. Your inbox placement rate (measured through seed testing) should be above 90% by week 4 and above 95% by week 6. Your open rates should remain stable or improve as you increase volume. If any of these metrics trend in the wrong direction, your warm up needs adjustment.
Can I use an automated IP warm up tool?
Yes, automated IP warm up tools can handle the gradual volume increases and reputation monitoring for you. Many email service providers offer built-in automated warm up features. These tools follow a pre-programmed schedule that gradually increases your daily sending volume over several weeks while monitoring key metrics. Automated warm up is particularly useful for cold email outreach where manual warm up is more complex. However, automated tools still require you to provide a clean, engaged list and properly configured email authentication.
What is a good sending volume to start IP warm up?
A good starting volume for IP warm up is 50 to 200 emails per day, depending on your target volume and list quality. If you have a highly engaged list with open rates above 40%, you can start at the higher end of this range. If your list quality is uncertain or your engagement rates are lower, start at 20 to 50 emails per day. The key principle is to start low enough that any problems (complaints, bounces) are small and manageable, then increase gradually as you confirm positive metrics.
How do I recover from a failed IP warm up?
To recover from a failed IP warm up, first identify the root cause by reviewing Google Postmaster Tools data, your ESP analytics, and blacklist checks. If the cause is a high complaint rate, reduce volume by 50% and send only to your most engaged segment for 7 to 10 days. If the cause is a blacklisting, follow the delisting process for the specific blacklist. If the cause is authentication failures, fix your SPF, DKIM, and DMARC configuration. After addressing the root cause, resume warm up from week 1 volumes and rebuild gradually. Full recovery typically takes 30 to 60 days.
Does IP warm up affect my existing domain reputation?
IP warm up primarily affects your IP reputation, not your domain reputation. However, the two are connected. If your IP gets blacklisted or develops a poor reputation during warm up, the negative signals can spill over to your domain reputation over time. Gmail and Yahoo evaluate both IP and domain reputation when deciding inbox placement. A poor IP reputation can drag down your domain reputation, especially if the poor sending patterns continue for weeks. This is why it is important to use a separate sending domain for cold email outreach and to monitor both IP and domain reputation during warm up.